
This guide is for anyone who needs to inspect and/or modify HTTP requests to and from your macOS or Mac OS computer. For example, if you need to inspect Adobe Analytics or Google Analytics tracking beacons from Safari or Chrome.
See here for the Charles for Windows PC Guide
macOS Charles proxy use cases:
- QA/verify Adobe Analytics or Google Analytics tracking beacons
- Inspect and/or transform HTTP requests to and from your PC
- Throttle connection either to specific hosts or all hosts
- Local proxy for websites, apps, iOS Simulator, or Android Studio
- Set up macOS to proxy for iOS, iPhone, iPad, Android, tvOS, and Apple TV
- Monitor tracking beacons from Safari, Chrome, Firefox, Edge
- Proxy HTTP & HTTPS traffic for macOS Mojave and macOS Catalina
Charles Proxy is a powerful website optimization and QA tool for developers, analysts, and engineers. With Charles you can monitor exactly how your application communicates with a remote server.
Part 1 – Certificate Set Up
The first part of the guide will help you add the Charles SSL Certificate to your Mac so that Charles can decrypt any local HTTPS traffic.
Step 0 – Download and install Charles
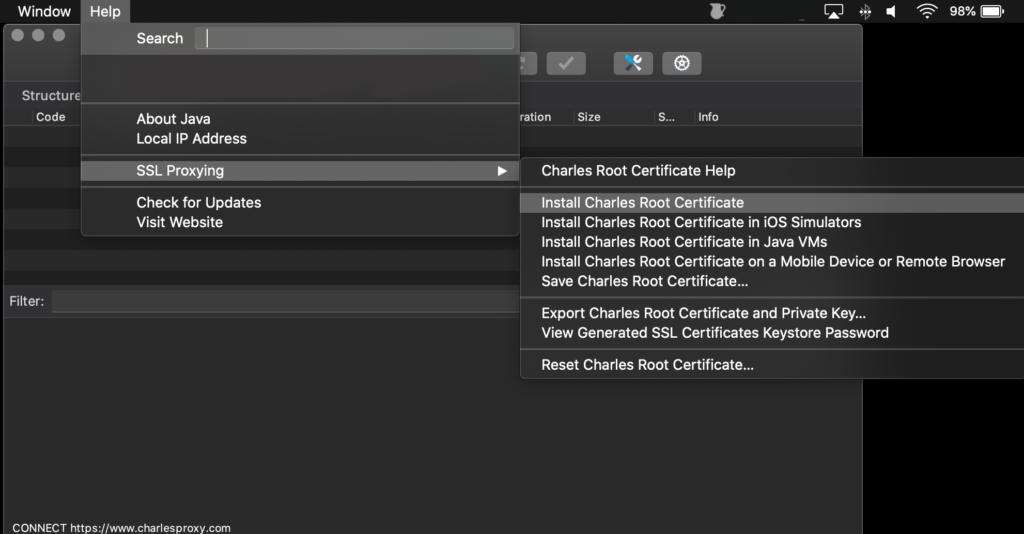
Step 1 – Open Charles then go to Help > SSL Proxying > Install Charles Root Certificate
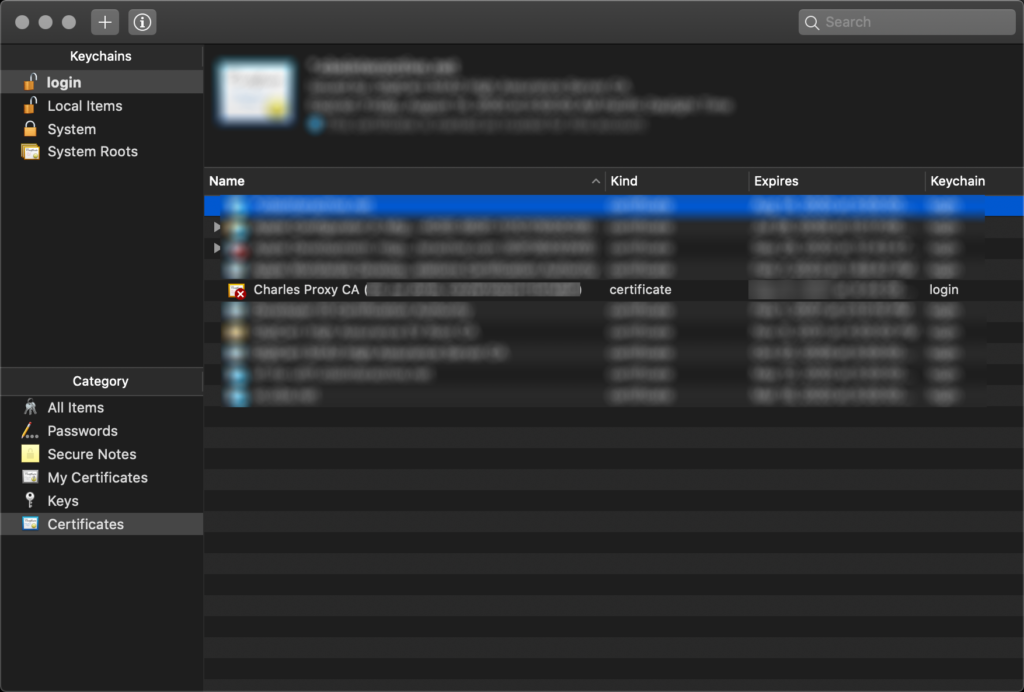
Step 2 – The Keychain Access window will open up. Notice “Charles Proxy CA” shows up with an “X”.
Step 3 – Double click on “Charles Proxy CA“.
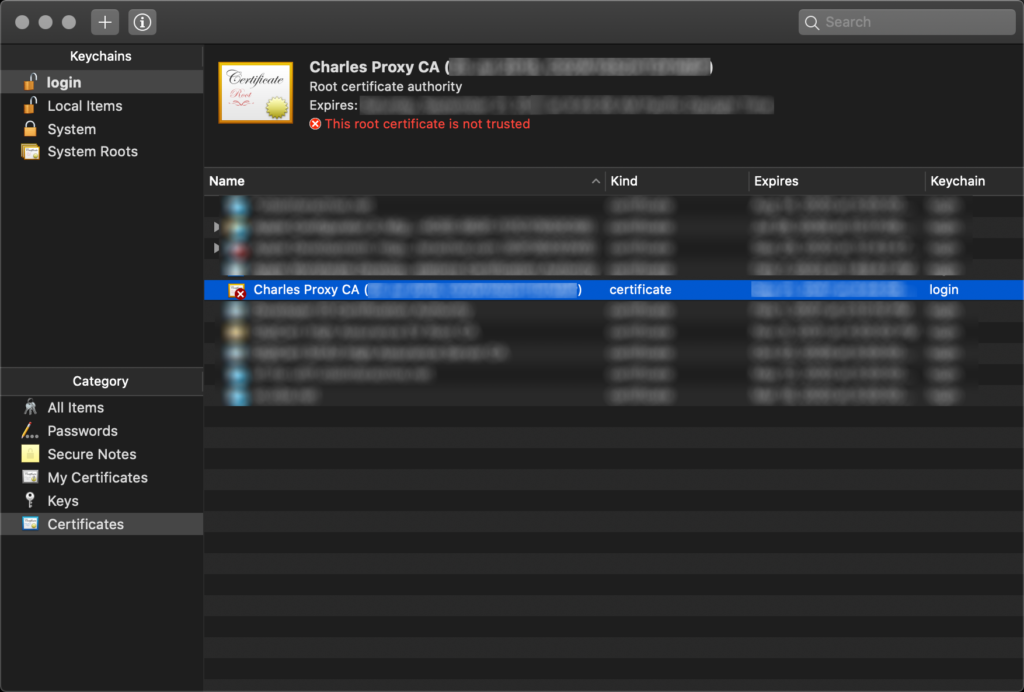
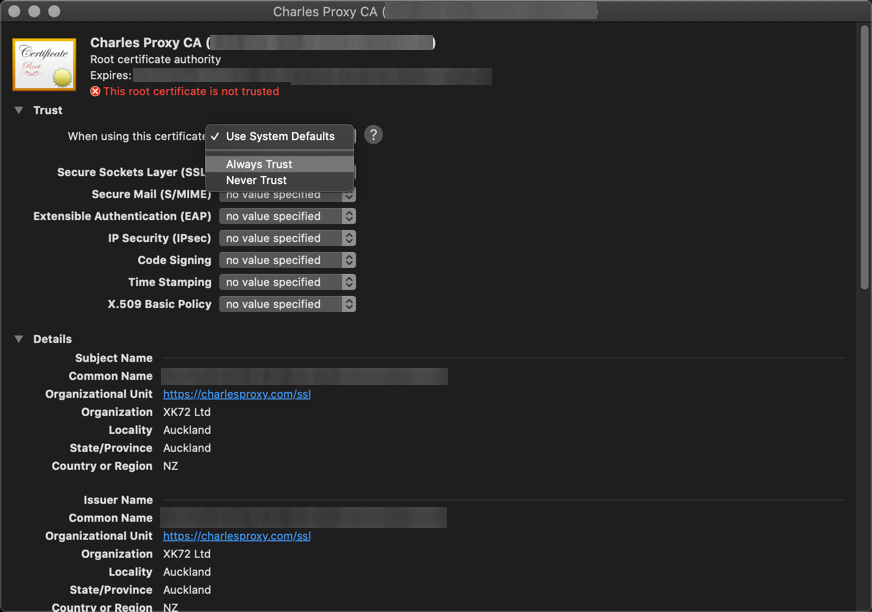
Step 4 – A new window showing the details of the Charles Proxy CA certificate will open up.
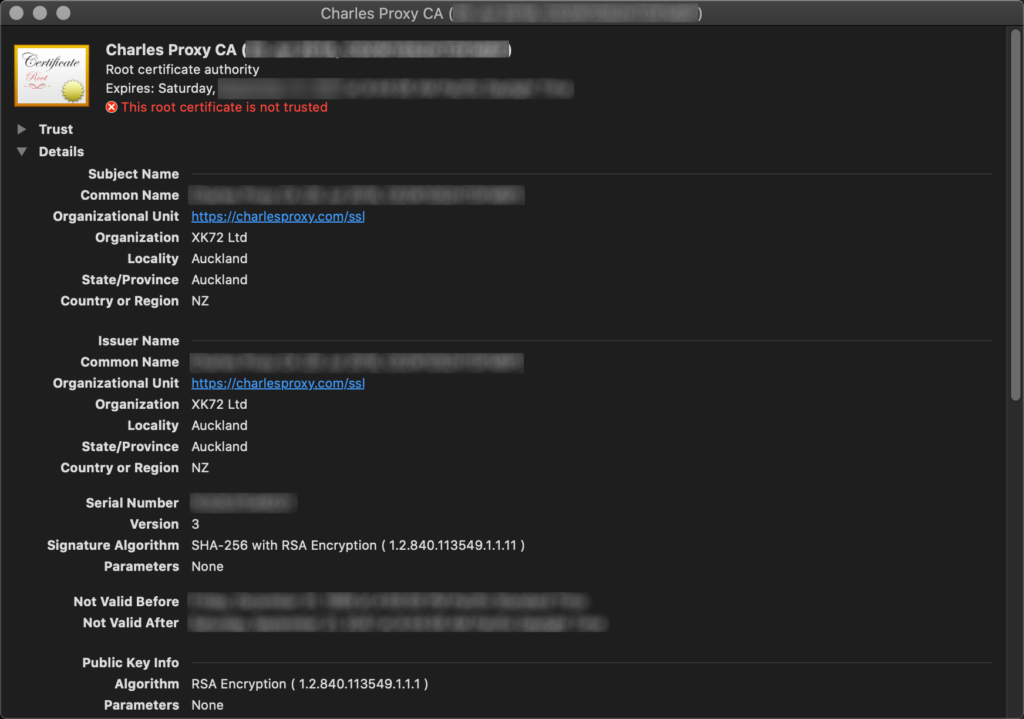
Step 5 – Expand Trust, then click into the “When using this certificate” dropdown and select “Always Trust“.
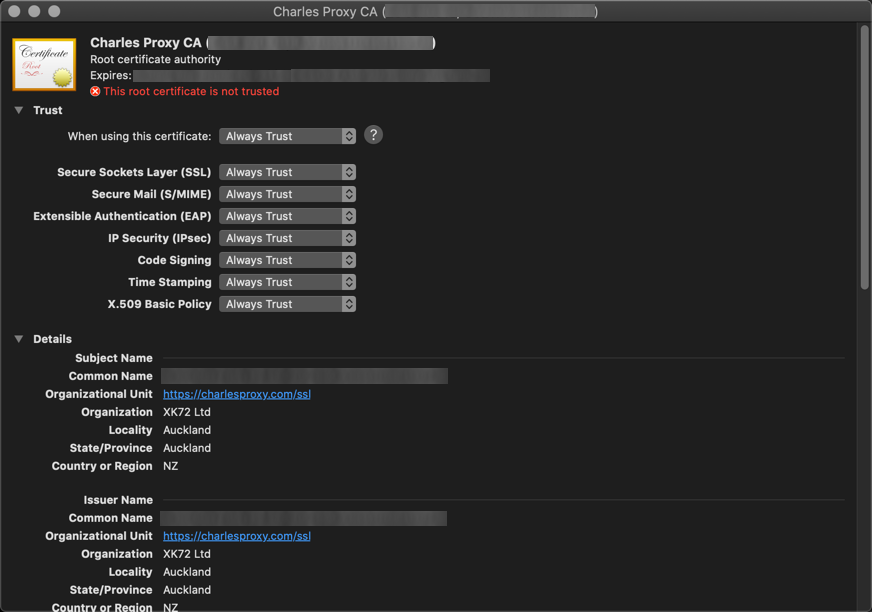
Step 6 – All the options under Trust should be set to “Always Trust” as shown below.
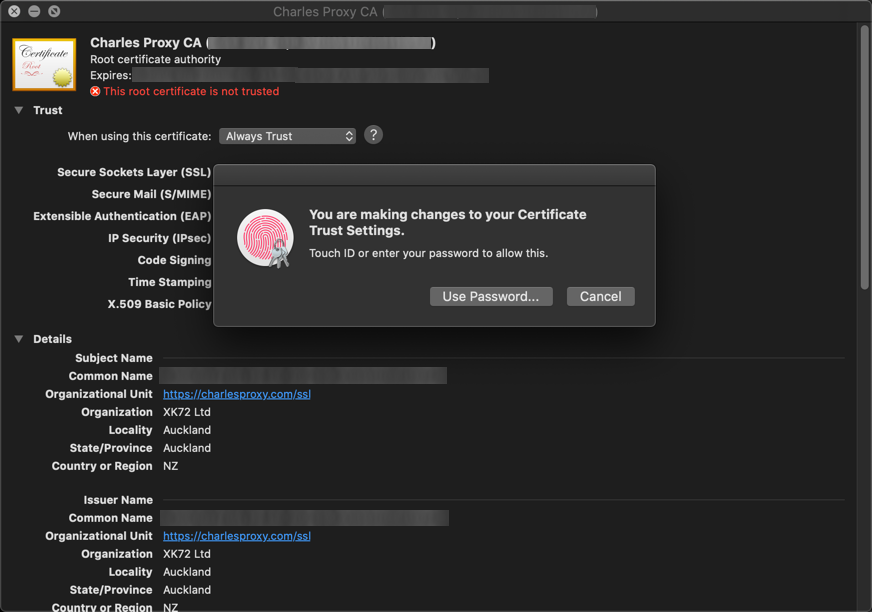
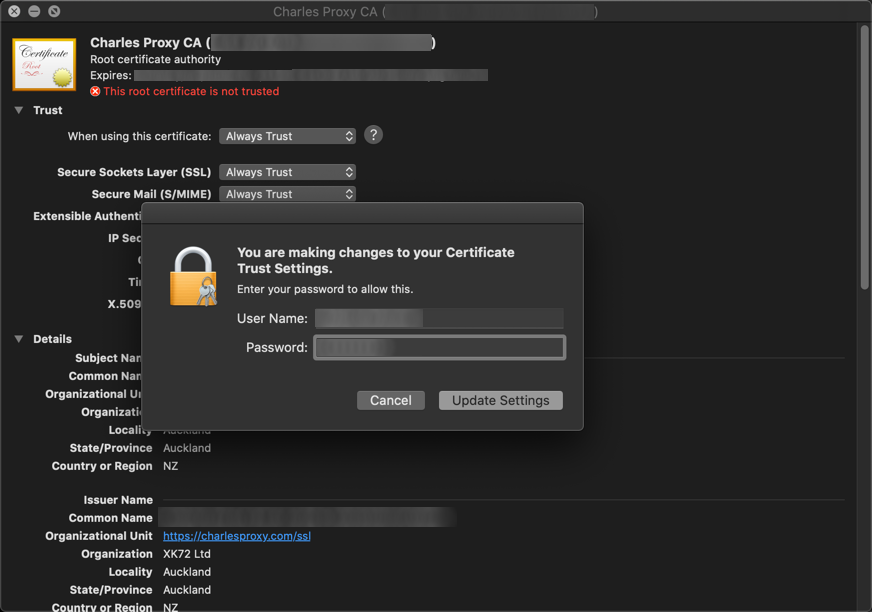
Step 7 – Close the Charles Proxy CA window. You should be prompted with a confirmation and may need to enter your admin username and password for the changes to take effect.
Step 8 – Back at the Keychain Access window you should see green next to the Charles certificate.
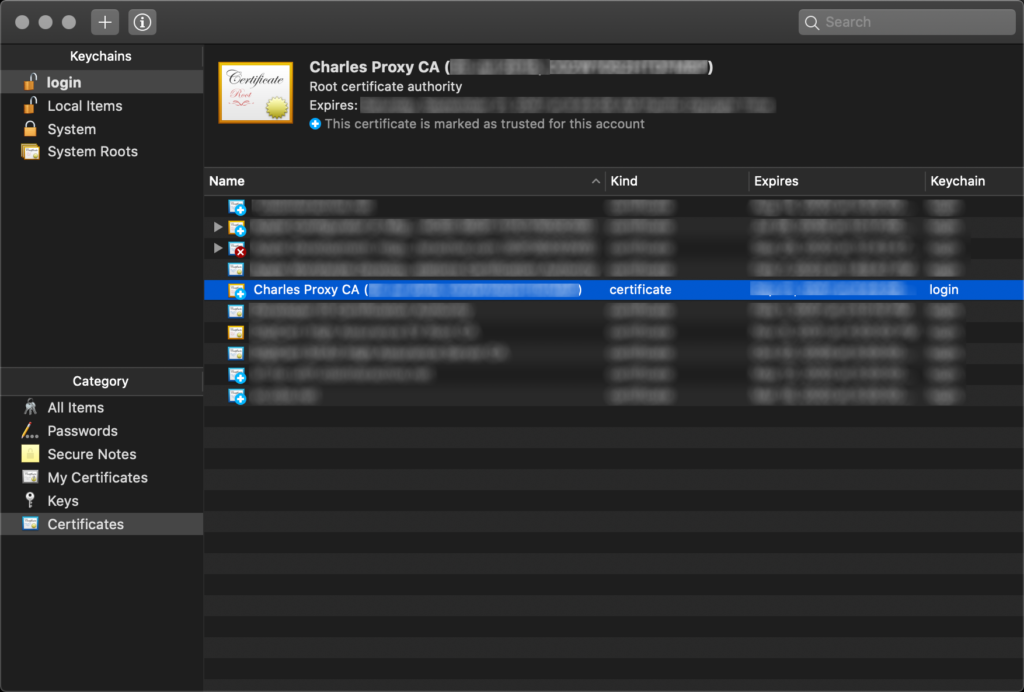
We’re done setting up the Charles SSL certificate on macOS. You may close the Keychain Access window.
Part 2 – SSL Proxying Set Up
This part will help you set up Charles so that it can decrypt HTTPS encrypted traffic.
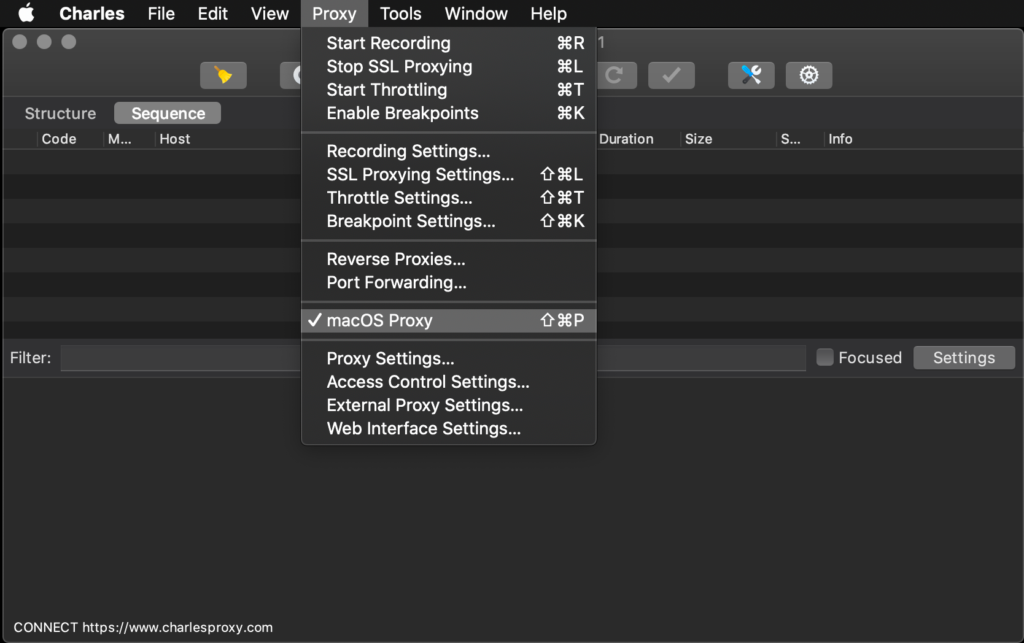
Step 1 – Enable macOS Proxy if it is not enabled already. Click on Proxy > macOS Proxy. You should see a checkmark to indicate that the macOS proxy is enabled.
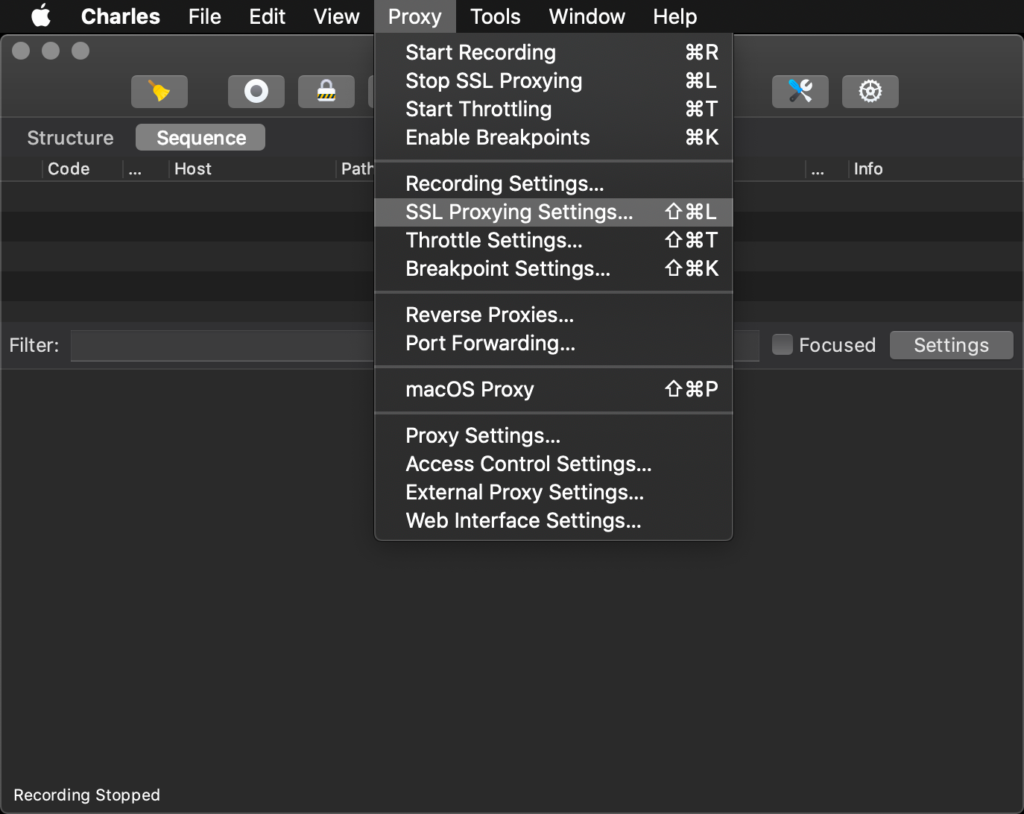
Step 2 – Go to Proxy > SSL Proxying Settings
Step 3 – Click on the “Enable SSL Proxying” checkbox, then under “Include”, click “Add“.
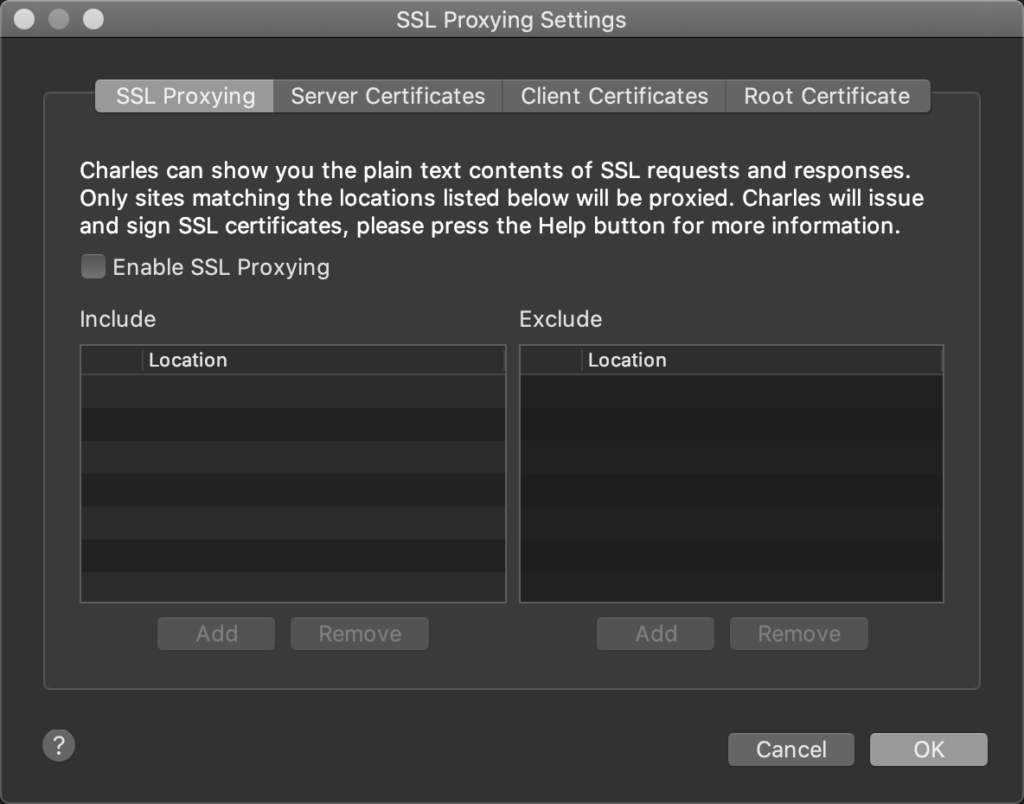
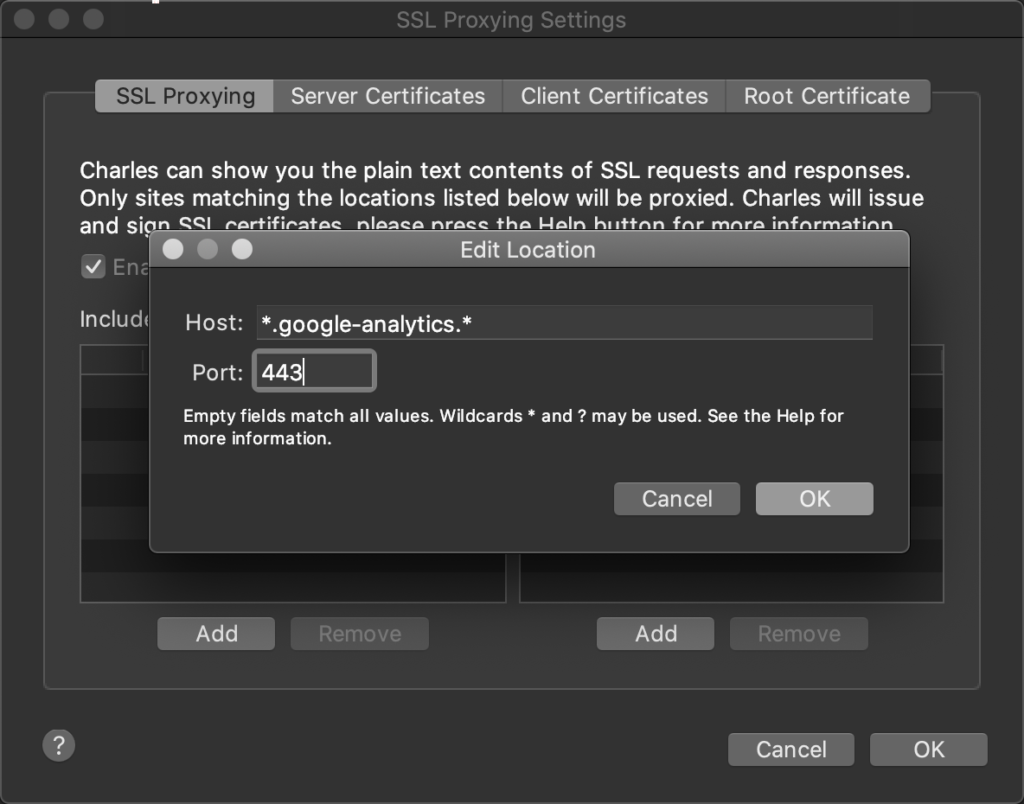
Step 4 – Enter the host and port that you want to decrypt. See the table below for common host patterns used for analytics QA and validation. Then click “OK“, then click “OK” again to go back to the main Charles window.
Common Hosts Used in Analytics QA
| Usage | Host | Port |
| Adobe Analytics (3rd Party Cookies) | *.omtrdc.* | 443 |
| Adobe Analytics (Common FPC CNAME Option) | smetrics.* | 443 |
| Adobe DTM & Launch | *.adobedtm.* | 443 |
| Google Analytics | *.google-analytics.* | 443 |
| Google Tag Manager | *.googletagmanager.* | 443 |
| Tealium IQ | *.tiqcdn.* | 443 |
| Decrypt All HTTPS Requests | * | 443 |

Step 5 – Close Charles and Re-Open
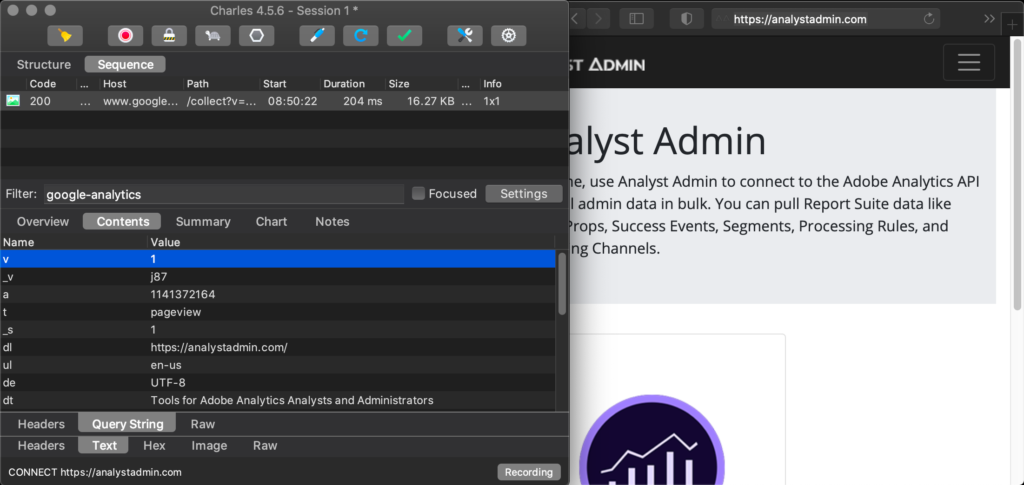
Step 6 – Enter “google-analytics” as the Filter and on a new browser tab, go to https://analystadmin.com/, you should see the HTTPS Google Analytics tracking beacon go out.
For users who only need to intercept HTTPS on your local machine (Ex: web browser), you can stop here.
iOS Simulator Charles Proxy Set Up
This part only applies to users who need to proxy traffic from a simulated iOS device.
Step 0 – Install XCode from the Mac App Store.
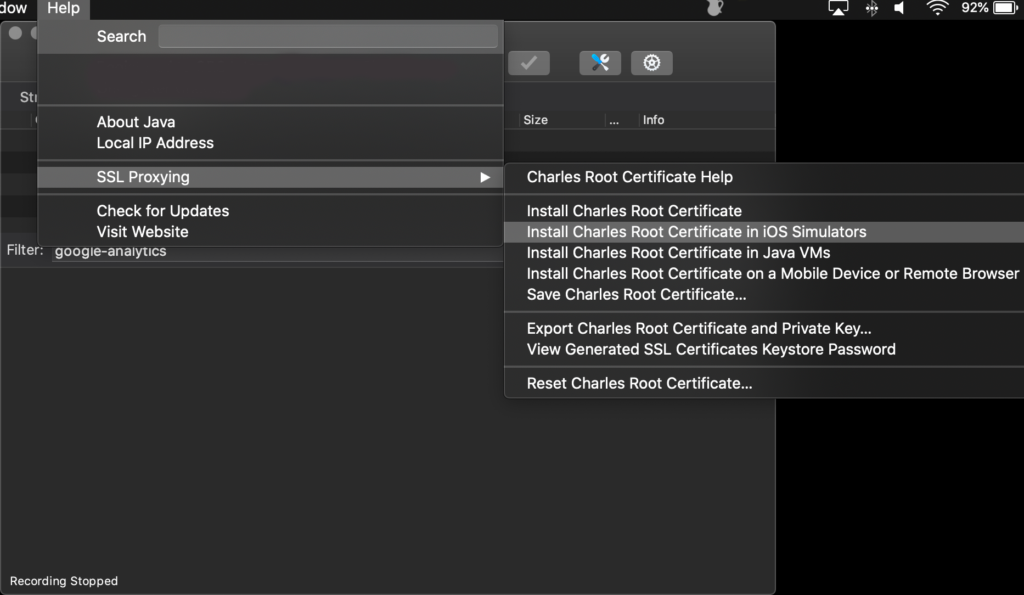
Step 1 – In Charles, go to Help > SSL Proxying > Install Charles Root Certificate in iOS Simulators.
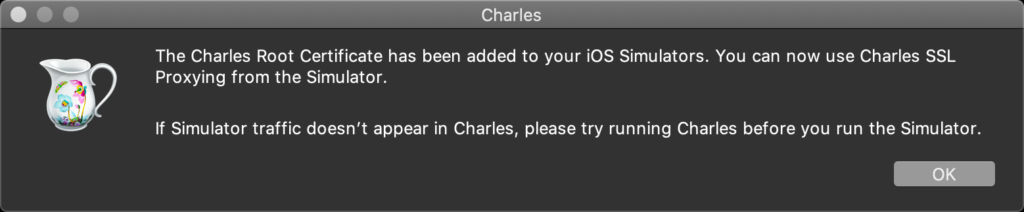
Step 2 – You should see the confirmation message shown below. Click “OK“.
Step 3 – Open up the iOS Simulator. Enter Command + Space Bar and type “Simulator”, then open the Simulator app.
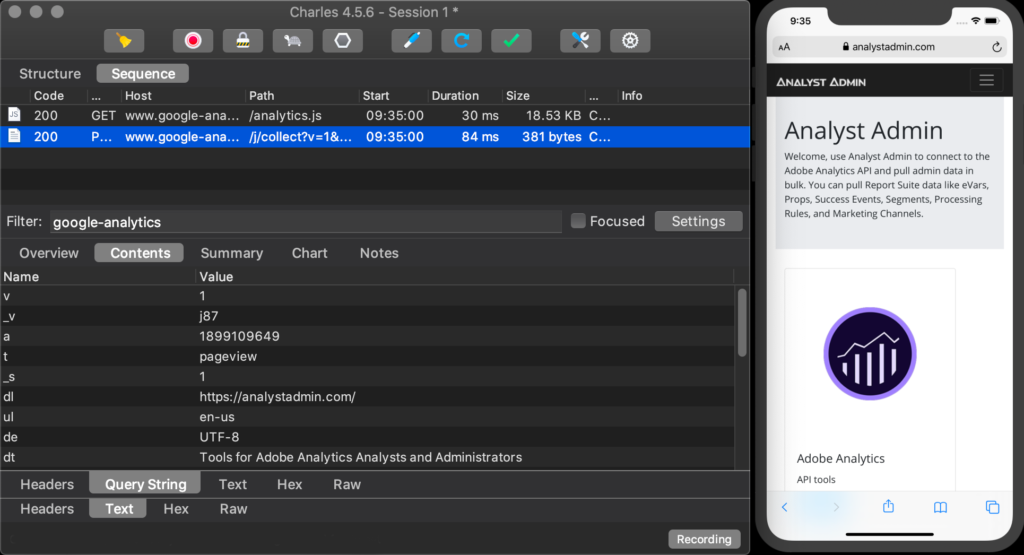
Step 4 – In Charles, filter by “google-analytics“, and on the iOS Simulator go to https://www.analystadmin.com/. You should see the Google Analytics pageview HTTPS request captured in Charles.
You’re done! Now you have a macOS computer that can proxy local traffic as well as external traffic from phones and tablets.
Common Issues with Charles Proxy
| Symptom | Troubleshooting Tips |
|---|---|
| Charles shows garbled text in HTTPS request content | – Check that Enable SSL Proxying is checked in SSL Proxying Settings – Check that your host list contains the host that you are looking to decrypt – Check that the Charles SSL Certificate is installed on your Mac or external device (whichever device sends out the data needs to have the certificate installed) |
| Charles doesn’t show any requests or Charles shows fewer requests than expected | – Check that you have no active VPN connections. Charles often times doesn’t work well over VPN – Check that you have started recording (the red/black button on the main Charles toolbar) – Try removing your request filter – Uncheck “Focused” to make sure there are no filters under Focused Hosts – If browser testing, disable all add blocker and cross-check with another browser – If you are attempting to proxy an external device, make sure that you are on the same network. – Offices sometimes have strict firewalls and router settings that may block proxying in general or specifically block port 8888, which Charles listens on. Check with IT or try proxying with a more advanced hotspot Charles method. |
I’ve been trying to find a solution to my issue for two weeks. And finally found your page! Itt helped and solved my issue! THANK YOU SO MUCH! 🙂
Thank you too! I’m happy you found it helpful.